How are email reports and notifications generated?
Generate email report
The email report data is always generated locally on your backup server using the database files to produce a statistical overview of your backups.
By default, CubeBackup will generate an email report at 12:00 AM, according to the daily, weekly, or monthly schedule you have selected in the web console. If your server is shut down at that time, you may miss an important email report. Fortunately, CubeBackup for Google Workspace also supports triggering the generation of daily, weekly, or monthly reports on demand using the following command:
cbackup sendMailReport <daily|weekly|monthly>NOTE:
1. On Windows, the cbackup.exe file is located in the C:\Program Files\CubeBackup4\bin directory by default. On Linux, the cbackup file is usually located in the /opt/cubebackup/bin directory.
2. This command requires special privileges:
If CubeBackup runs on Windows, please run this command in a Windows Command Prompt using an Administrator account. For example:"C:\Program Files\CubeBackup4\bin\cbackup.exe" sendMailReport <daily|weekly|monthly>If CubeBackup runs on Linux, please open a bash shell and use
sudo -u cbuser /opt/cubebackup/bin/cbackup sendMailReport <daily|weekly|monthly>
SMTP settings
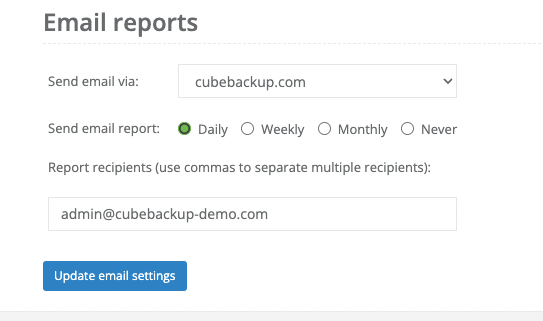
Not only can you configure the email reports to be generated Daily, Weekly, or Monthly, you can also select which mail service will be used to send the reports. CubeBackup for Google Workspace supports sending the backup/restore email reports through cubebackup.com, Gmail SMTP service, your own SMTP server, or Google Workspace SMTP relay services.
Default settings
If cubebackup.com is selected in the Send email via dropdown list, the email reports will be sent from your backup server, using MailGun's API, to the recipient or recipients you specify. The sender will be listed as either '[email protected]' or '[email protected]'.
TIP: MailGun is a well-known provider of email APIs services, which enable developers to integrate email features into their products.
Gmail SMTP server
CubeBackup for Google Workspace also supports sending email reports using Gmail SMTP server. This option requires you to authenticate with a personal Gmail address or a Google Workspace account and passwords.
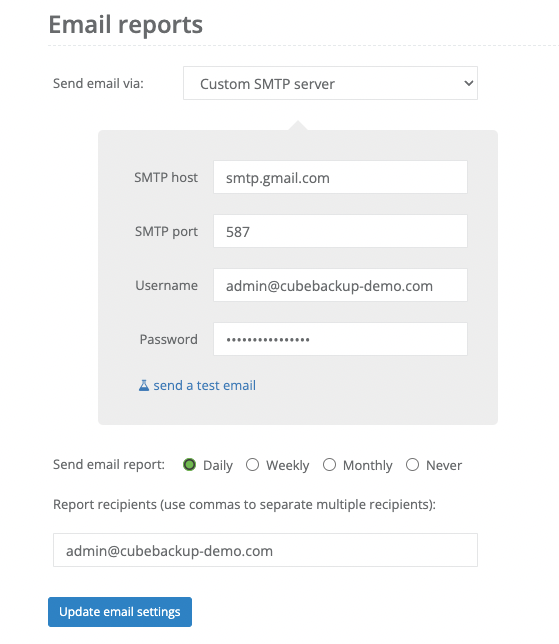 For security reasons, Google blocks non-OAuth logins by default. Please follow the instructions below to generate an App password for CubeBackup, or allow less secure app access in your account.
Generate App password
For the sake of security and privacy, we recommend that you create an App password to grant permissions to access your Google Account.
Go to your Google Account .
On the left navigation panel, click Security.
Under How you sign in to Google, select 2-Step Verification and follow the on-screen steps to enable it.
If you don't have this option, it may be because 2-Step Verification has not been set up in your domain. In that case, please contact your domain administrator to enable it or proceed with Solution 2: Allow less secure app access.
At the bottom of the 2-Step Verification page, select App passwords.
Enter a name that helps you remember where you'll use the app password and click Create.
Copy and paste the displayed password into the CubeBackup console and send a test email to verify that all settings are correct.
Allow less secure app access
You can also allow less secure app access.
- Go to your Google Account .
- On the left navigation panel, click Security.
- In the "Less secure app access" panel, click Turn on access.
- Switch on "Allow less secure apps".
- Now you can go back to the CubeBackup console and send a test email to verify that all settings are correct.
Custom SMTP server
If Custom SMTP server is selected in the Send email via dropdown list, the overview will be sent through your own mail server and therefore be completely private. In addition to Google SMTP service, you can also route the email reports through your own company's SMTP server.
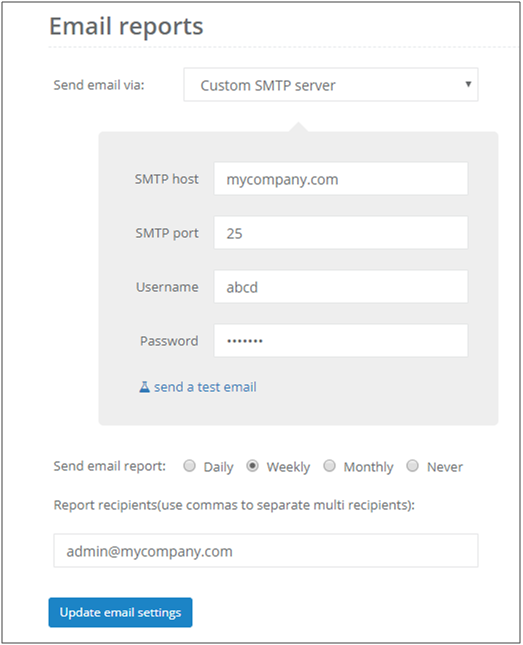
After configuring your custom SMTP server, you can click send a test email to verify that all settings are correct.
Google Workspace SMTP relay service
The Google Workspace SMTP relay service allows CubeBackup to send email reports and other notifications to your mailboxes. Authenticated with the IP address or a valid user sign-in, this option is both secure and easy to configure. Please simply follow the instructions below:
For the legacy free edition of G Suite, the feature is not available yet. You may consider configuring the Gmail SMTP server instead.
- Sign in to the Google Admin Console .
- Select Apps > Google Workspace > Gmail from the left panel.
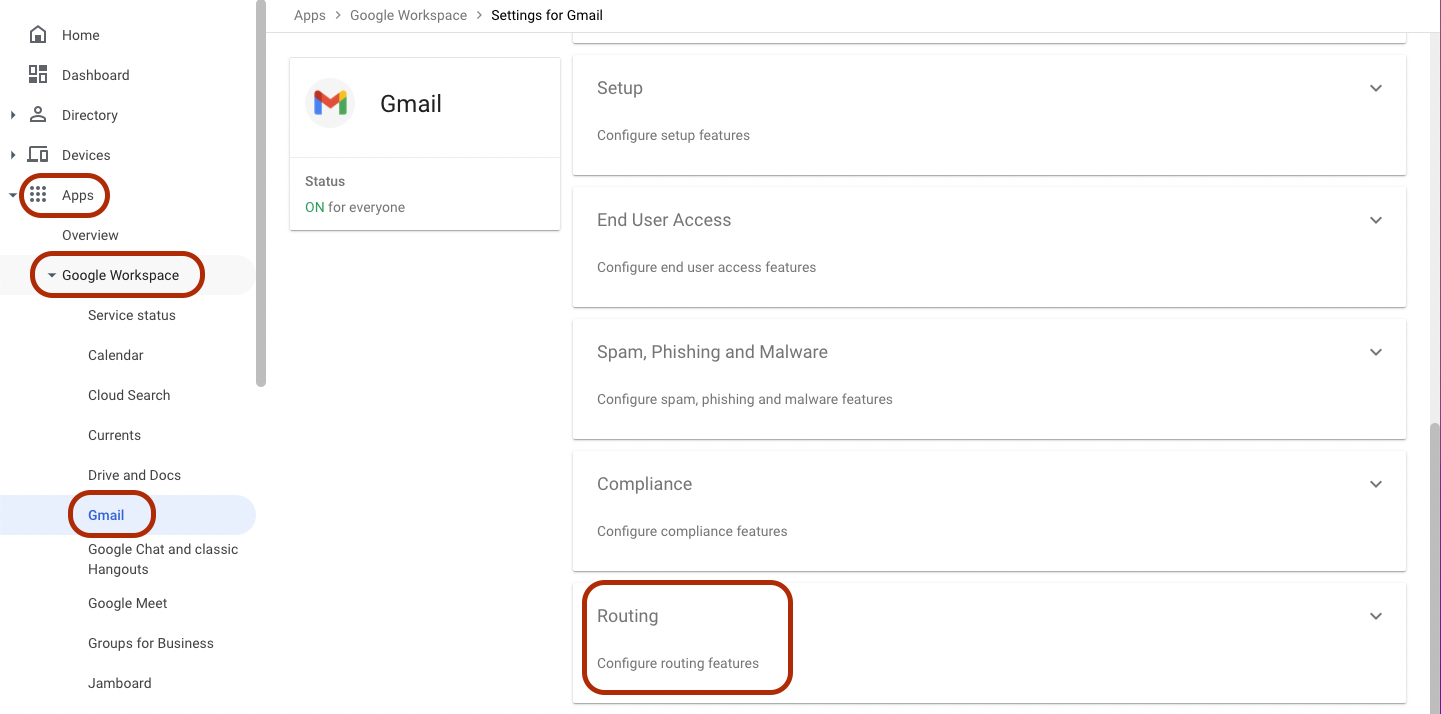
- Click on the Routing section of the Gmail settings page, then scroll down to the SMTP relay service, and click ADD ANOTHER RULE.
- Enter a description for this new rule.
In the Allowed senders section, we recommend you select Only address in my domains or Only registered App users in my domains.
Only addresses in my domain allows you to specify a sender address in your registered domain.
Only registered Apps users in my domains requires a registered Google Workspace user as the sender.In the Authentication section, check one or both boxes to set an authentication method:
- If your CubeBackup server has a static IP address, we recommend that you use the Only accept mail from the specified IP addresses option, and follow the prompts to add your IP address or range.
- You can also check the Require SMTP Authentication option, which requires you to enter a valid username and password in the SMTP settings in CubeBackup.
In the Encryption section, check the box Require TLS encryption to add another layer of protection.
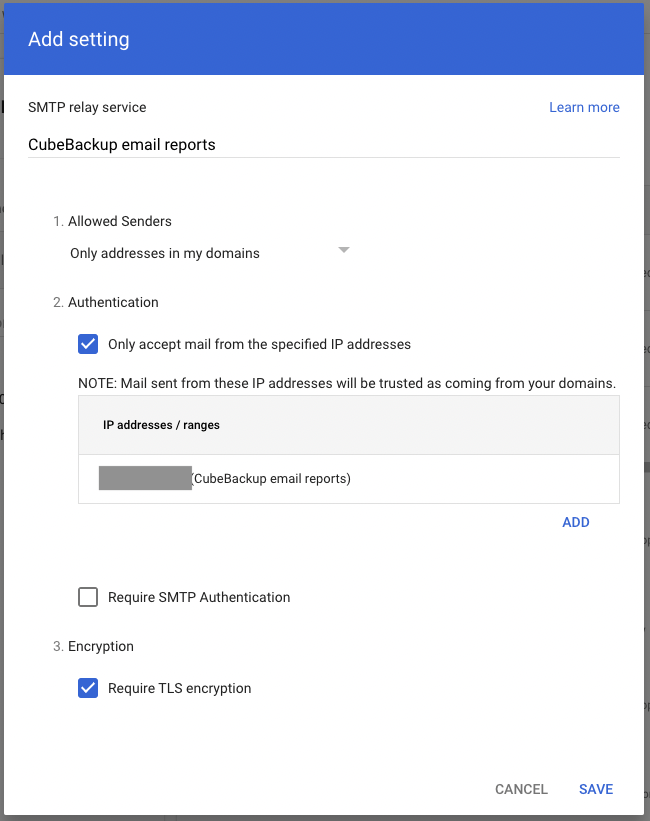
Click SAVE to add the rule.
Note: It may take up to 24 hours for the settings to propagate to your Google Workspace. If error messages pop up when sending a test email, please wait patiently and try again later.
Return to the SETTINGS page in the CubeBackup console and switch to the System tab.
Select Custom SMTP server from the dropdown list. Enter smtp-relay.gmail.com as the SMTP host and 587 as the SMTP port.
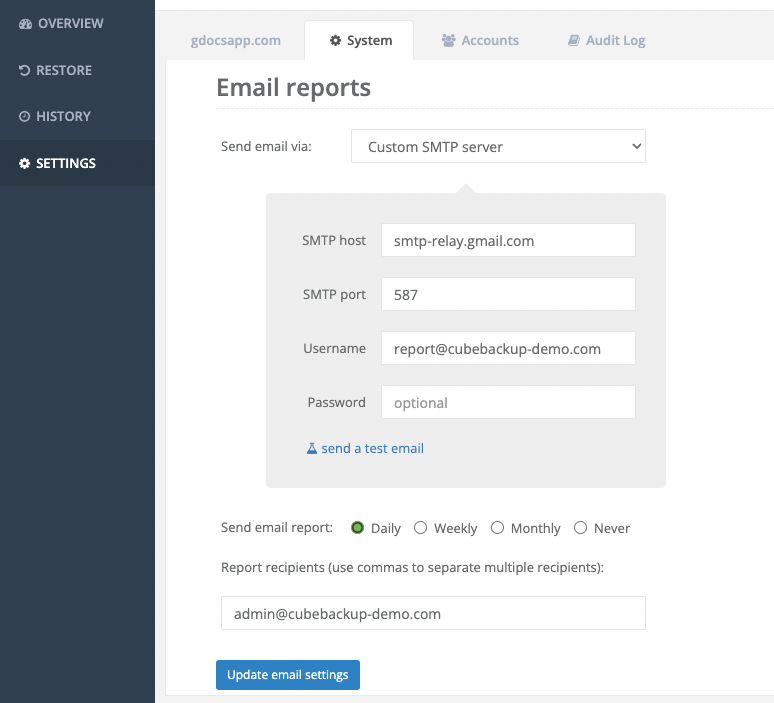
Specify a Username in your domain as the email sender.
Note:
If you choose Only registered Apps users as the Allowed sender, please ensure the email has already been registered as a user in your Google Workspace.
If you also select Require SMTP Authentication, please enter both a registered email address and its App password.Before clicking Update email settings, you can send a test email to confirm that your Google Workspace relay is working.