How to backup Google Workspace data to Wasabi cloud storage.
Wasabi is an Amazon S3 compatible cloud storage service with more affordable pricing.
Note:
Wasabi has a minimum storage retention policy , and it charges for deleted files. Additionally, when a file is modified or overwritten in Wasabi, the original copy of this file will be treated as a deleted entry which may result in unexpected costs. CubeBackup employs SQLite files to keep histories of backup files, and these SQLite files are modified frequently, which may result in some extra costs in Wasabi.
For customers using pay-as-you-go pricing models, the default storage retention policy is 90 days, whereas for customers using the RCS pricing model, the minimum retention is 30 days. To reduce the cost of deleted objects, you may wish to consider purchasing Wasabi Reserved Capacity Storage as a more cost-effective solution.
As an S3 compatible cloud storage, Wasabi's UI is similar to Amazon AWS S3. First create a bucket and an Access key.
Create a Wasabi bucket
Log in to the Wasabi console .
Create a bucket. In the wasabi dashboard, click Buckets > Create Bucket. In the dialog pop-up, enter a Bucket name and select a Region for the bucket, then click the Create Bucket button. You can leave the other options as default.
Create an Access key. Select Access Keys from the left panel, click Create Access Key. Select 'Root user' or assign it to a 'Sub-User' according to your company's requirement.
Once the access key is successfully created, a dialog will pop up, showing the created Access key and its Secret key.
Please Copy Keys To Clipboard and Download Keys. The Access key and its Secret key will be needed later in CubeBackup's configuration.
Setup CubeBackup with a Wasabi cloud storage
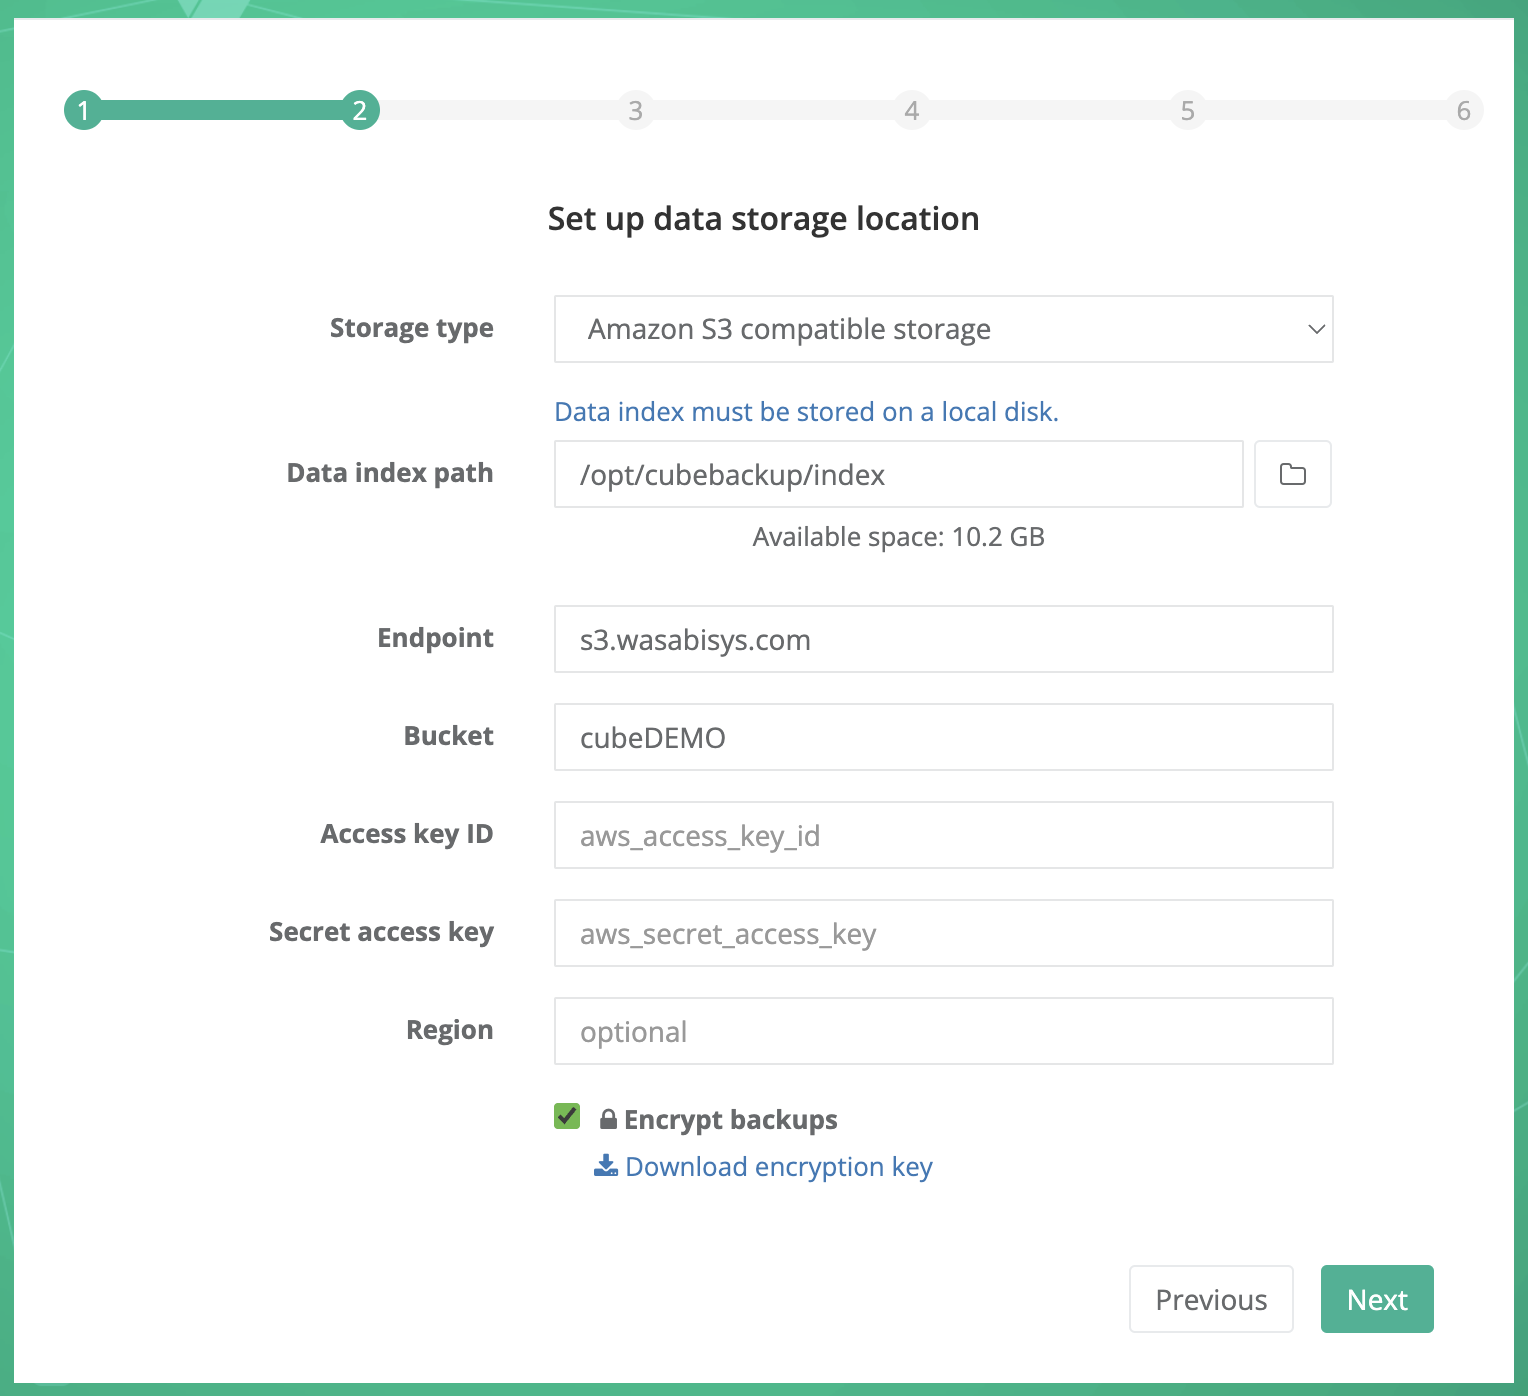
After creating the bucket and the Access key, go back to CubeBackup setup wizard:
Select "Amazon S3 compatible storage" for the Storage type.
Select a local directory for the Data index path. Data index acts as cache for backup data, and a local SSD is strongly recommended for storing data index. For more information about the data index, please visit here .
In the Endpoint field, enter the appropriate request URL for your bucket. Please refer to Wasabi's official documentation here .
Enter the name of the bucket you just created in the Bucket field.
Copy the Access key created in the Wasabi Console and paste it in the Access key ID textbox, then copy the Secret key value and paste it into the Secret access key textbox.
If you want your backups to be encrypted, make sure the Encrypt backups option is checked.
Before clicking Next in the CubeBackup setup wizard, we recommend that you download a copy of the encryption key file using the link provided and store it in a separate, safe location. The key is generated locally and is not stored anywhere except on your servers, which means that we at CubeBackup cannot help you if your key file is lost or damaged through server corruption or natural disaster. For more information about rebuilding your CubeBackup instance in the event of a disaster, see: Disaster recovery of a CubeBackup instance .
Click Next.
Go through the rest of CubeBackup configuration
You can continue to complete CubeBackup's configuration by following the configuration guide.