Introduction
As an online office and collaboration platform for business and educational organizations, Google Workspace provides Gmail, Google Drive, Shared drives, Contacts, Calendar, Sites, User, and domain management for millions of organizations all over the world. When a company or a school works on the Google Workspace platform, all business data is stored on Google Cloud so that employees can work on any device from anywhere. Though Google’s service is more reliable than on-premise servers, data loss may still occur due to human error, hacker intrusions, or network issues; data can also be lost when employees leave your organization and their accounts are removed from your Google Workspace domain. As a responsible IT administrator, you should always keep an active backup of your Google Workspace data.
CubeBackup is a self-hosted Google Workspace backup solution which can be configured to store backup data on cloud storage, like Google Cloud Storage, AWS S3, or Azure Cloud Storage. For more information, see How to backup Google Workspace data to Amazon S3 and How to backup Google Workspace data to Google Cloud Storage.
CubeBackup also supports backing up Google Workspace data to S3 compatible storage, such as Backblaze B2, Wasabi, and Cloudian. In this tutorial, we will use DigitalOcean’s S3 compatible storage, DigitalOcean Spaces, as an example to demonstrate how to configure CubeBackup with S3 compatible cloud storage.
Step 1 – Create a droplet virtual machine on DigitalOcean
First, you should set up a server to run the CubeBackup application. CubeBackup can run on a local server or a cloud VM, and it is available both on Windows and Linux. Start by creating a DigitalOcean droplet running Ubuntu 20.04.
Note: When creating a Droplet on DigitalOcean, choose a hardware plan with no less than 4GB RAM.
Step 2 – Install CubeBackup on a DigitalOcean Droplet
- SSH into your droplet server from your local machine:
ssh root@your_IP_address
- Install CubeBackup on the Ubuntu server:
curl -s https://www.cubebackup.com/install.sh | sudo bash
After running the above script, you will see the following output, which means CubeBackup has been successfully installed on the server.
Installing CubeBackup Service ….. OK
Starting CubeBackup Service ….. OK
CubeBackup was successfully installed.
You can configure through the web console: http://<server-ip>:80
Step 3 – Create a DigitalOcean Space
- On your DigitalOcean Console, select Spaces from the left panel.
- On the Spaces page, click the “Create ∨” button, and select “Spaces”.
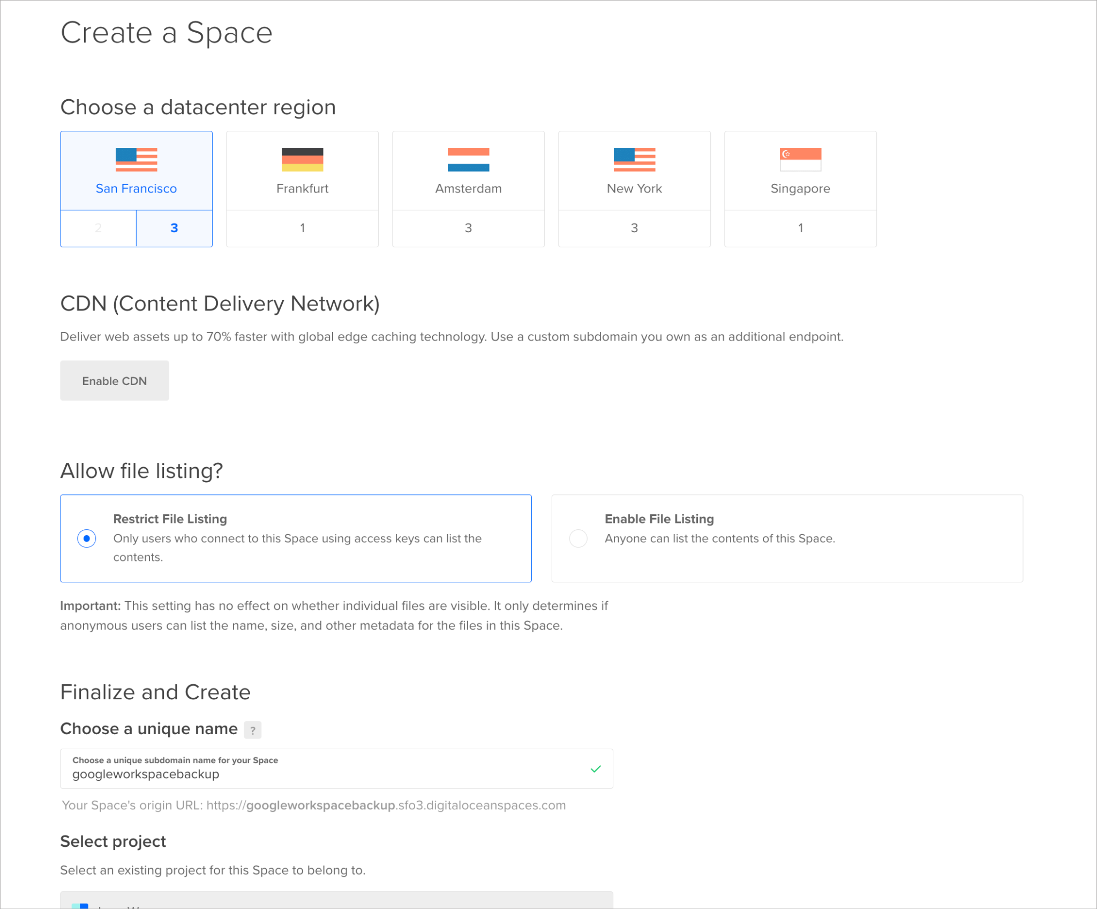
- Select a datacenter that is located in the same region as your Droplet VM. European users may need to select an EU data center to comply with GDPR.
- In the “Allow file listing” section, select Restrict File Listing.
- Enter a unique name for the Space.
- Select an existing project for the Space if you have multiple projects.
- Click Create a Space.

Step 4 – Create a Spaces Access Key
After the Space has been created, an Access Key must be generated to allow a program to access the Space through APIs.
- On your DigitalOcean Console, select API from the left panel.
- On the “Applications & API” page, click Generate New Key in the “Space access keys” section.
- On the Spaces page, click the “Create ∨” button, and select “Spaces”.
- Enter a name for the access key, then click the ✅ button.

Please keep this page open, as the access key and its secret will be used in the next step.
Step 5 – Configure DigitalOcean Space Object Storage as the backup location in CubeBackup
After creating the DigitalOcean Space and Access Key, you can now configure CubeBackup to use the newly created Space as backup storage. Access the CubeBackup web console by visiting http://< droplet-server-ip> from a web browser on your local computer. A configuration wizard will pop up.
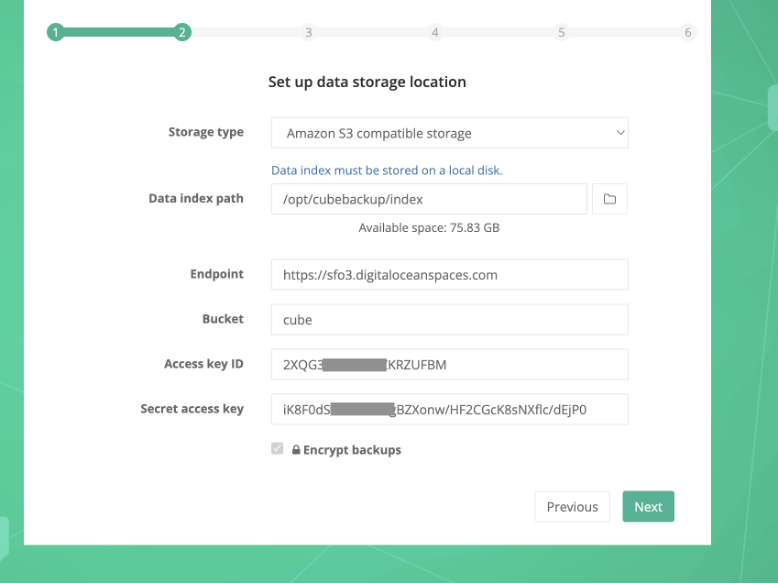
Click Next on the Welcome page, and you will be asked to configure the storage location for your backup. On this page, select “Amazon S3 compatible storage” from the Storage type dropdown list:

Please fill in the other fields:
- Data index path: Keep the default value as it is.
- Endpoint: The endpoint of the DigitalOcean Space.
To determine the correct endpoint for your Space, go back to the DigitalOcean console, on the Spaces page, click the “More ∨” button of the Space you just created, then select Settings. On the Settings page, copy the value of EndPoint and paste it to the corresponding field on the CubeBackup wizard.
- Bucket: The name of your DigitalOcean Space.
- Access key ID: The Spaces access key generated in Step 4.
- Secret access key: The access key secret generated in Step 4.
Finally, click Next on the configuration wizard.
Step 6 – other configurations
After configuring your backup storage by setting DigitalOcean as the backup location, CubeBackup will ask you to create a Google Service account to access corresponding Google APIs. For detailed information, please follow the instructions in the CubeBackup configuration guide.
Backup & Restore
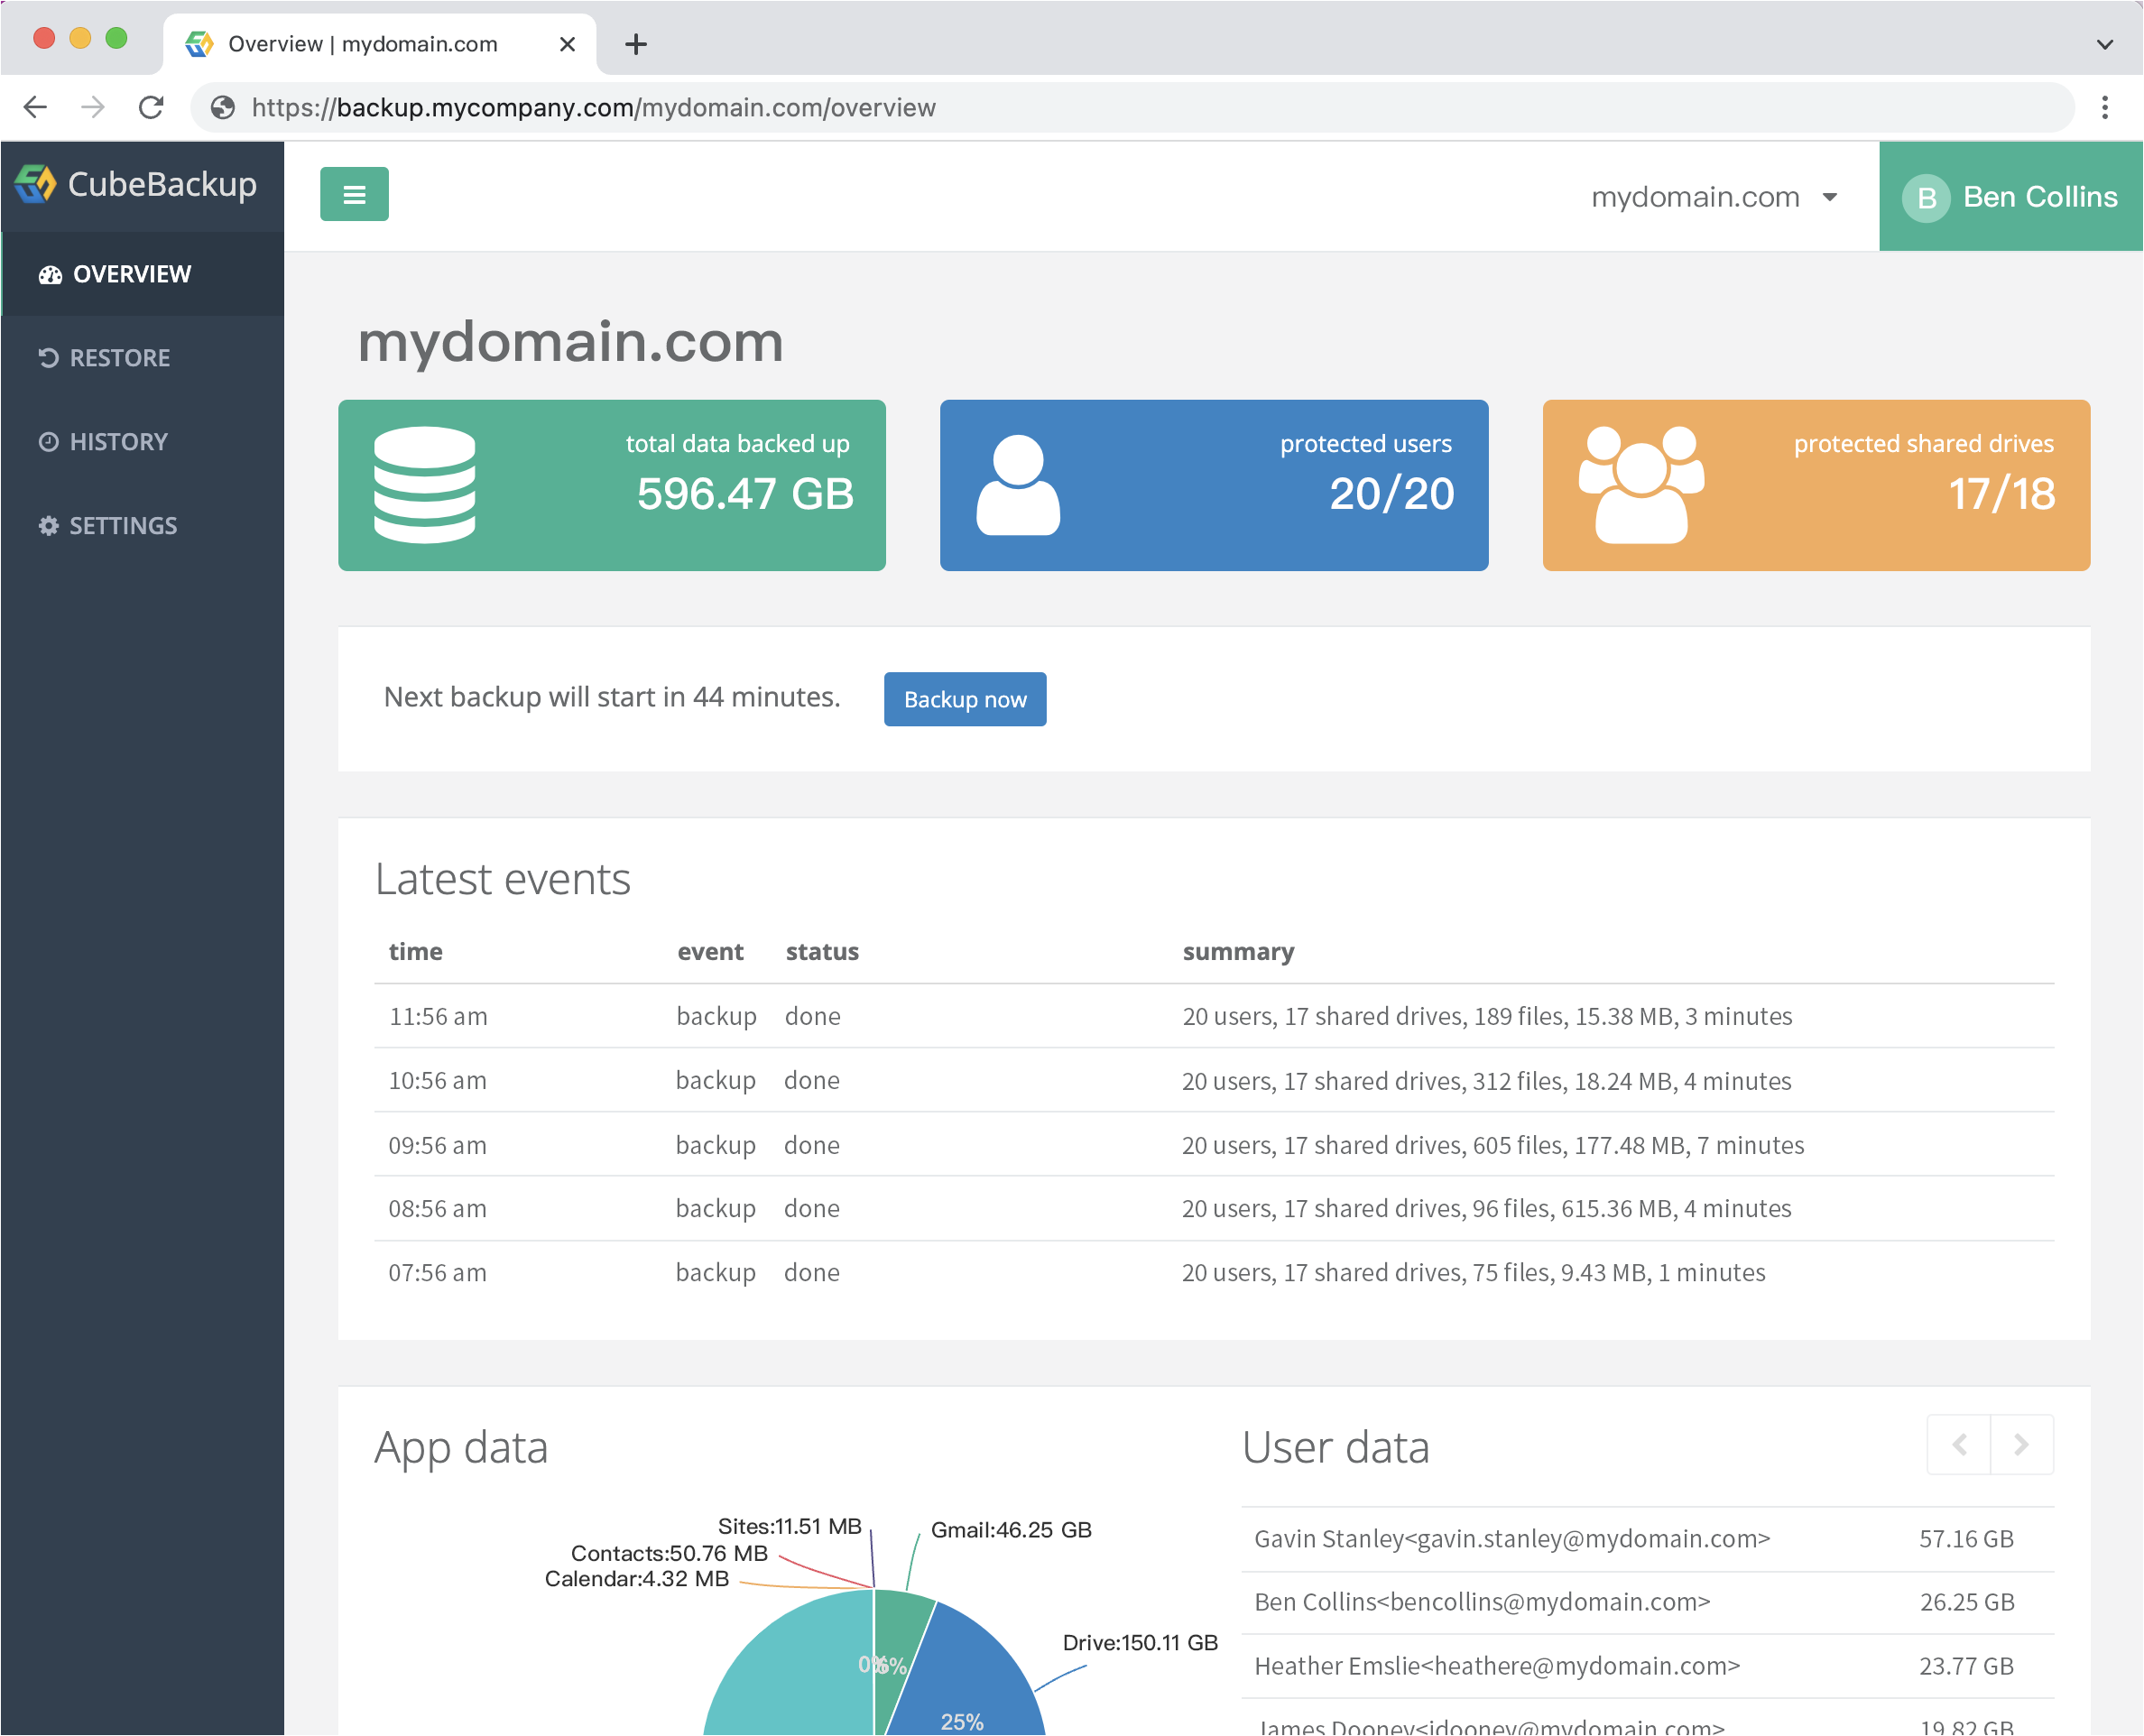
After the initial configuration, CubeBackup will automatically backup all data in your Google Workspace domain. The first backup may take a long time, depending on the number of users and the size of data in your domain. However, subsequent backups will be much shorter and smoother, since CubeBackup will only backup new or modified data each time.
Not only can the deleted data be restored, but you can also revert a file or a folder to its previous state. CubeBackup keeps version histories of the backup data, so it allows point-in-time restore.

Conclusion
CubeBackup is an excellent backup tool for Google Workspace, which supports a variety of different storage types, including on-premises storage and cloud storage. By running CubeBackup on a cloud VM, and backing up data to S3-compatible cloud storage, you can set up a reliable and cost-effective backup solution to protect your business data on Google Workspace. If you want to learn more about CubeBackup, check out the CubeBackup website.